Before you approve anything
- Connecting a wallet does not execute actions
- Connecting a wallet does not move funds
- Connecting a wallet does not grant trading permission
- Responsibility remains fully on the user
Before you click anything
Connecting a wallet defines how the system will recognize you and request approvals in the future. Connecting a wallet is access setup: it defines how the interface will reference you and request future approvals. It is not an action.
Your wallet = your account
On Hyperliquid, you do not create an account - your wallet is your account.
That means:
- you fully control your funds
- there is no password recovery
- transactions cannot be reversed
If you lose access to your wallet, you lose access to your funds.
It is not a login, and it does not shift responsibility to the system.
The "Connect wallet" button

Clicking "Connect" sets the wallet address that the system will use as a reference for all future actions and approvals.
At this point
- no message is signed
- no permission scope is granted
Screen: Wallet selection
This screen selects how future actions will be authorized, not whether actions are allowed.
You are not granting permissions here - you are choosing the environment that will be used for future approvals.
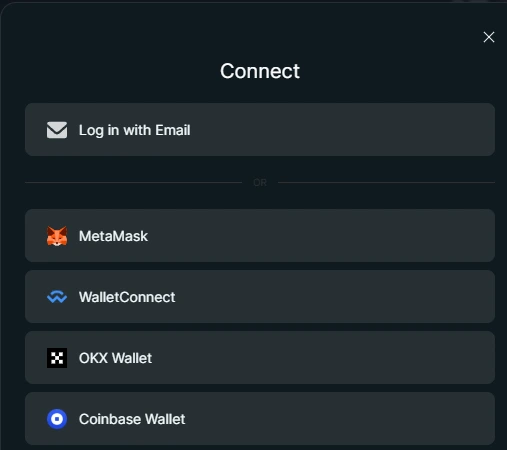
You are choosing the environment that will be used for future approvals.
Access options comparison
The word "account" may appear in the interface, but this is not a Binance-style custodial account. It is a way to keep your session and interface state connected, not a place where the platform holds your funds.
Choose your sign-in method
Choose how you want to connect to Hyperliquid: through email or through an external wallet.
- Email access - the simplest option for beginners. A wallet is created automatically, without installing MetaMask.
- Wallet access - for people who already use MetaMask, Rabby, or another wallet.
At this stage, you are only choosing a sign-in method.
What to understand
- You are not opening a trade yet
- You are not moving funds yet
- Any money-related action will still require a separate confirmation
Main idea
Connecting a wallet is not permission to take actions. It is only a way to enter the interface and choose how you will confirm actions later.
Email-based access
Email login is the fastest way to get started if you do not already use a wallet.
When you enter your email, Hyperliquid creates an access setup for you so the interface can remember your session and show your trading state.
Every important action still needs a separate confirmation later.
Enter your email
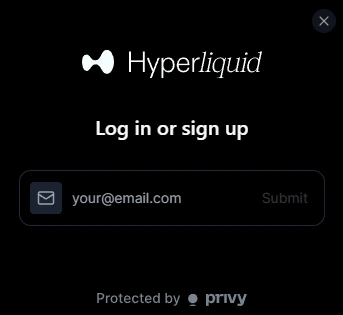
This screen finishes the email access setup.
After this step, you can continue to funding your account.
What happens here
Wallet-based access
Wallet-based access means the interface connects directly to a wallet you control.
Authorization happens through wallet signatures, not through a site-managed account.
Recommended wallet for this guide: MetaMask.
Keep your recovery phrase safe
When you create a wallet, you receive a recovery phrase, usually 12 words.
This is the only way to restore access to your wallet.
- Never share it
- Never store it online
- Write it down and keep it somewhere safe
Screen: Wallet connection approval

In this example, the selected wallet is MetaMask. This confirmation screen belongs to your wallet, not to Hyperliquid. Approving this request only connects your wallet address to the interface. It does not approve trades, move funds, or grant spending permission.
Fastest way to get started
If you want to skip manual setup, you can use email login - a wallet is created for you automatically.
You can export it to a regular wallet later.
Next step
At this point, access setup is complete. The next step is to move funds into the trading environment.