ПЕРЕД ПОПОЛНЕНИЕМ
- Пополнение — это реальное ончейн-действие
- Вы переводите средства на торговый баланс Hyperliquid
- Средства становятся доступными только после подтверждения депозита
- Ответственность за сеть, адрес и сумму остаётся на вас
Что делает этот шаг
Пополнение переводит USDC из вашего кошелька на торговый баланс Hyperliquid.
Пока депозит не завершён, вы можете подключить кошелёк и изучать интерфейс, но не сможете открывать позиции.
Когда депозит подтверждён, средства становятся доступными для торговли.
Hyperliquid использует USDC
Даже если вы заводите другие активы через встроенные способы пополнения, в торговом интерфейсе они должны стать доступными как USDC.
Поэтому самый простой путь — сразу пополнять баланс в USDC.
Используйте правильную сеть
Убедитесь, что отправляете средства через поддерживаемую сеть, например Arbitrum One.
Если выбрать неправильную сеть или адрес, средства могут задержаться или быть потеряны.
Когда сеть, адрес и сумма проверены, можно переходить к пополнению.
Шаг 1 - откройте экран пополнения
Экран: вход в пополнение
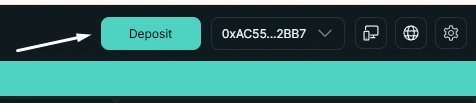
Кнопка Deposit в интерфейсе
Пополнение начинается в интерфейсе. Вы открываете панель депозита, чтобы указать актив и сеть отправки.
Этот шаг еще не перемещает средства, он подготавливает транзакцию.
Шаг 2 — выберите актив и сеть
Экран: форма депозита
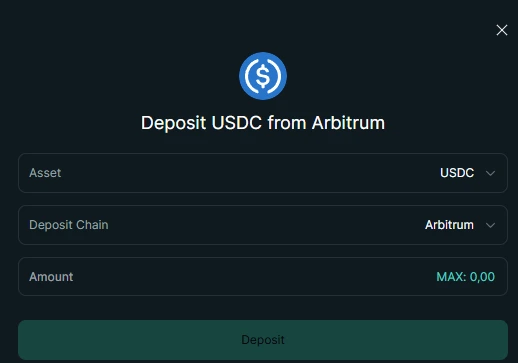
Перед подтверждением выберите актив, сеть и сумму.
Обычно для торговли на Hyperliquid используется USDC, а один из популярных вариантов сети — Arbitrum.
Главное — чтобы сеть в форме депозита совпадала с сетью, из которой вы отправляете средства.
Если выбрать неправильную сеть или актив, депозит может не поступить автоматически. Перед отправкой проверьте актив, сеть и сумму.
Простой вариант: пополнение картой
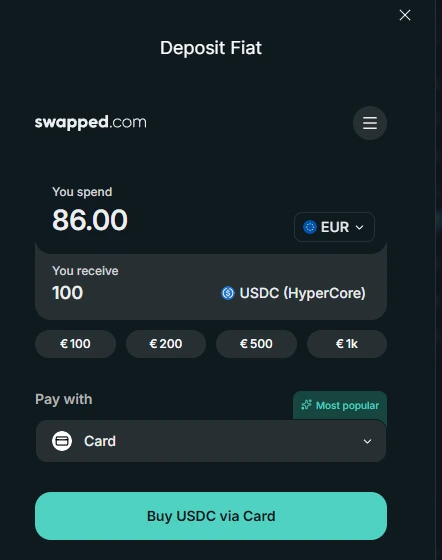
Купите USDC картой прямо на экране депозита.
Купите USDC картой прямо на экране депозита.
Это самый простой путь для новичка: вы сразу получаете USDC в сети Arbitrum, которая подходит для пополнения Hyperliquid.
Если ваши средства уже находятся в другой сети, их нужно сначала перевести в Arbitrum.
Шаг 3 — подтвердите депозит в кошельке
Экран: подтверждение в кошельке
Этот шаг относится к пополнению через кошелёк, например через MetaMask. Он не относится к покупке USDC картой.
Подтверждение транзакции в кошельке
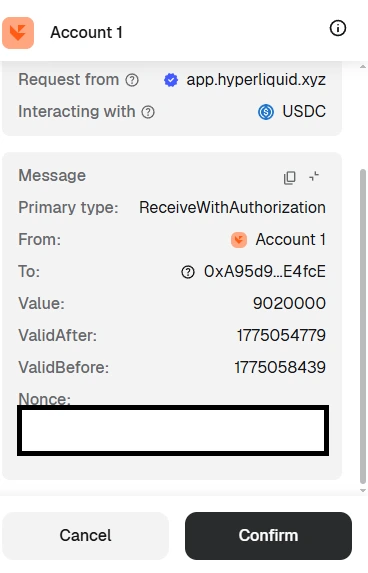
На этом этапе вы фактически отправляете депозитную транзакцию из своего кошелька.
Для подтверждения депозита держите небольшое количество ETH в сети Arbitrum для сетевой комиссии. Без ETH в Arbitrum кошелёк не сможет отправить транзакцию.
На этом этапе кошелёк попросит вас подтвердить действие.
Первое разрешение для USDC
При первом депозите USDC может понадобиться сначала выдать разрешение на USDC.
Это отдельное разовое подтверждение, которое позволяет контракту обработать ваш USDC-депозит.
После этого вы подтверждаете саму депозитную транзакцию.
Именно здесь происходит перевод. После подтверждения его нельзя отменить.
После подтверждения:
- Средства уходят из вашего кошелька
- Транзакция отправляется в сеть
- Hyperliquid ждёт, пока депозит будет распознан
Шаг 4 — средства становятся доступными
Экран: обновлённый баланс
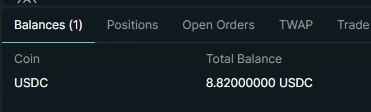
После подтверждения транзакции депозит появляется в доступном балансе.
После подтверждения транзакции депозит появляется в доступном балансе.
На этом этапе:
- средства доступны внутри Hyperliquid
- их можно использовать как залог
- торговля становится доступной
Дополнительное подтверждение после этого не нужно.
Куда попадают средства
После депозита средства становятся доступны для торговли на Hyperliquid.
Вы по-прежнему контролируете их и можете вывести обратно на свой кошелёк в любой момент.
Как думать о депозите
Депозит — это не просто перевод средств.
Это момент, когда ваши USDC становятся доступными внутри Hyperliquid и могут использоваться для торговли.
До депозита USDC находится только в вашем кошельке. После депозита он появляется на балансе Hyperliquid и определяет, какие позиции вы можете открывать.
Hyperliquid не хранит средства как обычная централизованная биржа. Ваш баланс отражает состояние системы, а не запись во внутренней базе компании.
Депозит на Hyperliquid и депозит на обычной бирже
Главная мысль
Депозит определяет, что вы можете делать на Hyperliquid: пока средств нет на балансе, вы не можете открыть позицию; когда депозит подтверждён, средства сразу становятся доступными для торговли.
Закрепление
Депозиты работают по той же логике, что и остальные действия в системе:
- действие меняет состояние напрямую
- доступность зависит от ончейн-подтверждения
- ручного слоя, который “проведёт” или “откатит” депозит за вас, нет
Когда депозит распознан, средства можно использовать сразу.
Можно переходить дальше, когда
- Вы понимаете, как USDC попадает на баланс Hyperliquid
- Вы можете объяснить, когда депозит становится доступным
- Вы помните, что подтверждённый депозит нельзя отменить
Частые ошибки
- отправить средства в неправильной сети
- не оставить немного ETH на сетевую комиссию
- внести слишком маленькую сумму для нормальной торговли
Следующий шаг
Теперь вы готовы открыть первую сделку.